Mustard In Bloom has moved from mustardinbloom.blogspot.com to... mustardinbloom.com here is the new link (just click on words in color).
Sorry, for any inconvenience. Thank you for visiting! MIB : )
7:35 PM
4:21 PM
His and Hers

I finally own a pair of
Since this is our rainy season, I wear them often... our back lawn is soggy, the field next to us is muddy, and there is usually a stream flowing in front of our house after it rains. Now that makes me happy!

his Boots. . . my Boots!


more soggy ground. . .


I love my granddaughter's boots. She'd rather wear them instead of shoes.

so cute!
10:12 PM
Apron.ol.ogy

Just some aprons I've made from my stash of fabric finds. I'm always on the look out for colorful or unusual prints. A girl just can't have to many aprons in my opinion.

The yellow paisley apron (below) was made from a barely worn if at all shirt dress to small to fit any human I know. After ripping open the side seams I pieced it to have enough to make the front part. (sorry I don't have a before and after pic...I didn't know I would be blogging when I made it 6 mos. ago). It has a pocket on the side trimmed with black rick rack.

love the paisley print

the print on this apron has an oil cloth look

The red floral print is one of my favorite fabric finds. I feel like twirling in my kitchen when I'm wearing one of these.There was enough fabric to make a full + half apron. I added a little rosey swirl accent for the front.

This rosey apron is my take of a loved and worn apron (bottom pic) that I found at a garage sale. I bought it hoping to make one like it. The printed area is one big balloon pocket. I can think of several ways to use this pretty + functional apron.
For instance I can see myself wearing this apron to pick green beans and tomatoes or cuks... instead of dropping them on the ground. This handy little apron with a balloon pocket could be stuffed full of un-bruised veggies! Just thinking about it makes me want to go and plant some seeds. See ya...oh, but first I'll finish ologing about my aprons.

apron I made (above)

apron I found and love!
11:58 AM
Retro Tablecloth Apron (Quickie Tutortial)
I love bold printed retro tablecloths! This one I found at a garage sale. It's not perfect, it has a few stains + holes which only adds to the charm of it and it's a little faded but that didn't stop me from buying it. Last weekend I decided to make an apron out of it. The tablecloth was a 52" square cloth.
I didn't follow a pattern because I wanted to keep the tablecloth border as the main design of the apron. It worked out better than I thought it would. Here is a quickie tutorial of it being made.


I didn't follow a pattern because I wanted to keep the tablecloth border as the main design of the apron. It worked out better than I thought it would. Here is a quickie tutorial of it being made.


8:26 PM
Repurposing A Skirt

The blouse I still have hanging in my closet (pic above), the skirt I repurposed and used to accent the wreath you see below.


I’ve had this wreath on my door since November. It’s nice to hang something that isn’t too seasonal so it can stay up beyond Christmas. I’ll probably take it down in a few weeks but did you notice the wreath and the shirt have the same red fabric?
A generous neighbor gave me this lovely two piece outfit (skirt and shirt set) but the waistband on the skirt was too tight! I could wear it if I sucked in my tummy… but then I’d probably turn blue and pass out after a minute of torturing myself. The top fits me fine and is hanging in my closet. Anyway, the skirt got tossed in a not sure what to do with pile…
After gluing on the burlap and first fabric layer as I was making this wreath I felt like it needed something more...some color perhaps? As I was looking around for the right something I saw that pile of clothes that I wasn't sure what to do with... when the red skirt caught my eye.
Need I say more…except that I’ve been enjoying the wreath for months now hanging on my door!
8:14 PM
Cake Recipe From Mustard in Bloom's Kitchen

Here's the cake I made on Valentine's Day


Upside-Down Chocolate Chip Cake:
3 T. butter 1/2 cup unsweetened cocoa powder
1/2 cup brown sugar 1/4 cup brown sugar
4 tsp. water 2 tsp. baking powder
1/2 cup shredded coconut 1/2 cup milk
1/2 cup chopped walnuts 1/4 cup butter, softened
1 cup flour 2 eggs
2/3 cup sugar 1 tsp. vanilla
3/4 cup semisweet choc. chips; (divided 1/2 c. & 1/4 c.)
Preheat oven 350.
Melt 3 T. of butter in a 9 in. round cake pan on stove top burner that is turned on low. Stir in 1/2 cup brown sugar and 4 t. of water. Sprinkle coconut and chopped nuts in the pan and spread it around evenly. Set pan aside.
In medium mixing bowl stir together flour, sugar, cocoa powder, the 1/4 cup brown sugar and the baking powder. Add milk, the 1/4 cup softened butter, eggs and vanilla. Beat with an electric mixer on low speed until combined. Beat on medium speed for 1 minute. By hand, stir in 1/2 cup of the choc. chips (save the 1/4 cup for later). Spread batter into the pan that was set aside. Helps to not plop it all in the center; drop spoonfuls around the pan and spread with a fork or spatula.
Bake for 30 to 35 minutes. I watch the cake at the 30 minute time so it doesn't get to crispy on the edges. In my older oven it took 35 min. Ovens vary so watch closely. Cake will be firm in the center when lightly touched.
When done remove from oven and cool on wire rack for 5 minutes. Loosen sides; invert onto a plate. Immediately sprinkle remaining choc. chips over the topping (sometimes I add a little more. Let stand about 1/2 hour before slicing. Serve by cutting it into wedges like serving a pie.
Serves 8. Serve with whipping cream or cool whip. The cake tastes even better the second day : )
8:35 PM
In loving memory...
I want to dedicate this post to a lady who was a great example to me in the way she lived her life. She was a person who could love and lift everyone. I came across a recipe of hers’ and realized how much I miss her. She passed on to her eternal home (Feb. 2010).
A Recipe for a Better Attitude
- Never criticize others.
- Demonstrate faith by living it constantly.
- Courageously cheer others up. Remember, the word gospel means “good news”.
- Greet people with a smile.
- Plan on each day being the best you’ve ever had.
- Like what you are doing and who you are!
Thank you Afton… I’m going to try to follow your recipe a little better!

8:38 PM
Mush-y Soup?... Try This Recipe for Mush-room Soup!

Isn't the trophy lovely!
The first time I made this Mush-Room Soup recipe was for a soup & cake contest a year ago. . . well guess what. . .? I went home with the golden spoon award... now that is funny!
Funny, because I couldn't decided which recipe to make that day... I just couldn't make up my mind... I love making soups and stews and I have several favs but on a whim... I decided to try something new... something different... like this Creamy Mushroom Recipe!
I got it off the Internet and I don't remember where? it's been too long...but I do have a copy of the recipe to share.
Sorry, it's taken me so long for those who have asked me for it, but now you can make this yummy soup whenever you want.
Mushroom Soup:
1/4 cup butter
1 medium white onion, chopped
4 cloves garlic, minced
2 bay leaves
2 tsp. fresh snipped rosemary
1-1/2 lb. button mushrooms, coarsely chopped
2 14-oz. cans chicken or vegetable broth
2 cups whipping cream
2 Tbsp. olive oil
Directions
1. In large saucepan melt butter. Add onion, garlic, bay leaves, and rosemary cook over medium heat 5 minutes or until onion is tender. Add mushrooms; cook and stir 5 minutes. Add broth; bring to boiling. Reduce heat; simmer, uncovered, 5 to 10 minutes more or until mushrooms are tender. Remove bay leaves. Cool slightly.
2. In processor or blender, a third at a time, blend soup until almost smooth. Repeat with remaining soup. Return to the pan; season with salt and pepper. Bring to boiling. Whisk in cream; heat through.
3. Stir in oil. To serve, ladle soup in bowls, sprinkle snipped rosemary.
Serves 12.
6:08 PM
Crush or Mush?
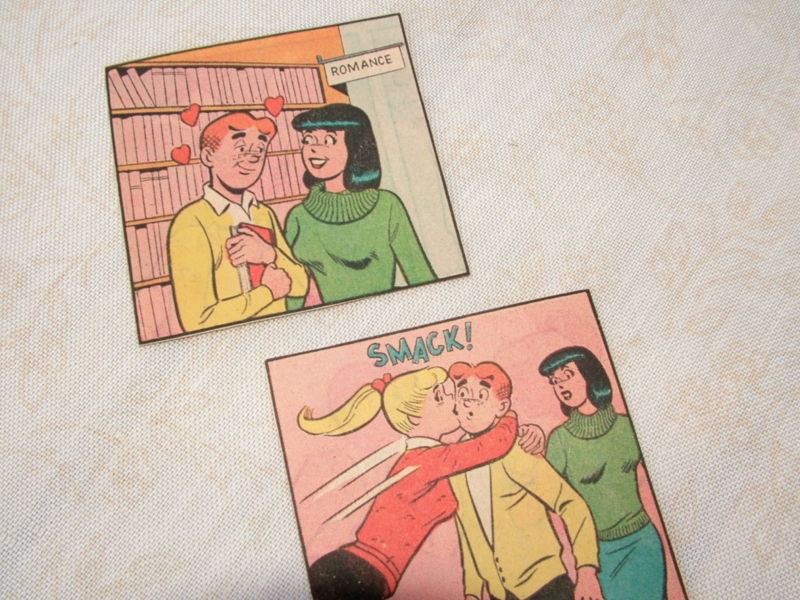
I've saved a few of my husband's comic books (not all but a few) that were published in the 60's. I don't think I'll keep them forever but every once in awhile I'll look through them. They are fun-ny and make me laugh! I cut a few strips from the "Archie Series". . . hoping to make coasters (need to find a product resilient to water and high temperatures). Until that happens or if it does... I'll have fun looking at them.

Romance in the library...

Now comes the drama!


Now comes the drama!

What's Next?...

3:33 PM
Serving Up Valentines!


5:27 PM
Got Shabby Pockets?. . . Tutorial for Heart Shaped Pockets
A shabby heart is a romantic heart....for your valentine!
I wanted to make something for Valentine's Day using some leftover upholstery backing I had purchased just before Christmas. I'm always experimenting with different things and since this backing was so cheap I figured I couldn’t go wrong with buying it. I found it in the 70% off bin at the fabric store.
For Christmas I used it as garland to decorate my tree. I liked how it turned out which made it well worth the few pennies it cost to buy it.
Then about a week ago I started thinking... could I use this to make something for Valentine's Day? I love the burlap + textural look of it. In fact, when I bought it, the clerk apologized for how shabby it was! I just laughed and told her that wasn't a problem... I was buying it for that very reason.
With Valentine's Day around the corner I started playing and this is what I came up with (see picture). So far, a simple heart pocket with potential...
Tutorial Begins Here:

This is my first tutorial... I will try to remember everything. Stay with me.
The upholstery backing I used may not be available for you. Art canvas is a good substitute; it's stiff and flexible. If you don't have canvas then experiment with water color paper, or the back of a cereal box or whatever you think will work. . . Maybe even a brown paper bag??
 Here's some of the supplies you will need (picture above). You will also need some fabric strips or ribbon for lacing. Fabric strips need to me anywhere from 1" to 1 1/4" wide and 34 or 36 inches long, depending on how long you want the handle. If you use ribbon at least 1/2 inch wide.
*The heart I made is approx. 6" x 6 inches. . . widest areas . Moving on...
Cut out a paper heart the size and shape you want. I folded a sheet of 8.5 x 11 inch paper in half lengthwise; then cut a heart shape. (You can make a sturdy template out of cardboard) that way you'll have a sturdy pattern if you plan to make many hearts. Better grab that cereal box!
Cut your heart with paper, then cardboard then trace it onto your foundation piece with whatever material you decided to use.
Tutorial Begins Here:

This is my first tutorial... I will try to remember everything. Stay with me.
The upholstery backing I used may not be available for you. Art canvas is a good substitute; it's stiff and flexible. If you don't have canvas then experiment with water color paper, or the back of a cereal box or whatever you think will work. . . Maybe even a brown paper bag??

*The heart I made is approx. 6" x 6 inches. . . widest areas . Moving on...
Cut out a paper heart the size and shape you want. I folded a sheet of 8.5 x 11 inch paper in half lengthwise; then cut a heart shape. (You can make a sturdy template out of cardboard) that way you'll have a sturdy pattern if you plan to make many hearts. Better grab that cereal box!
Cut your heart with paper, then cardboard then trace it onto your foundation piece with whatever material you decided to use.

Next evenly mark where you want the holes for lacing placed with a red marker. (color markers show up better than a pencil mark).
Mine are spaced about an inch apart and 1/2 inch in from the edge.

If you want a fancier front this is a good time to decorate it.
Use your imagination and be creative here. Look through your card stash and scrap booking supplies for inspiration.
I carefully tore out a card design...it's pretty and valentine like. Next, I applied an even coat of mod podge on the back of the card and laid the sticky side down onto the heart being careful rubbing and pressing it with my fingers.
Note: If your decal is made with thick or slick type paper fiber you may want some Aleene's: Super Thick Tacky Glue.... (one of my cards I had to use it, the other one I just used mod podge). The tacky glue I just mentioned works really well! It's good to have on hand. Remember to press on the decal without wearing down the paper fiber. Sometimes a damp only sponge brush can help even out the edges if needed but not too wet.

The mod podge is for the back of the decal. I poured some in a disposable bowl for ease.

Next, I took some fabric and tore a strip about and 1" wide + 34" or 36" long . I slipped the fabric strip between a bobby pin, lucky me I found one! Now start lacing. . . just like you did in school when you made hearts laced with yarn.

Leave at least a 2" tail beyond the first hole to tie the other end with.


I hope you are having fun because I am just telling you how to make them!
More pockets coming. . .

For a different look I used the same backing only this time I covered the heart with a paper napkin.
You will need to punch holes out of your heart foundation before gluing on the napkin if you do it this way. Note: This time you will apply glue to the base of the whole foundation piece - then layer the dry napkin on top. Roll a pencil along the top like a rolling pin to even or press it out. (The other way you glued the back of the decal, then stuck in on the dry foundation heart).
Punch out the holes again after the napkin has thoroughly dried or paper punch could tear napkin fiber you may need to help it pop out.
Tip: try not to get mod podge or glue on the top of the napkin when pressing it on. It helps to have a damp cloth near by to wipe sticky fingers. I used ribbon instead of a fabric strip and laced it up and down instead of around hole edges. Measure around your heart to know how much ribbon you will need. 36 inches was more than I needed for the napkin heart.


 A shabby pocket is a good thing when it's filled with love!

For a different look I used the same backing only this time I covered the heart with a paper napkin.
You will need to punch holes out of your heart foundation before gluing on the napkin if you do it this way. Note: This time you will apply glue to the base of the whole foundation piece - then layer the dry napkin on top. Roll a pencil along the top like a rolling pin to even or press it out. (The other way you glued the back of the decal, then stuck in on the dry foundation heart).
Punch out the holes again after the napkin has thoroughly dried or paper punch could tear napkin fiber you may need to help it pop out.
Tip: try not to get mod podge or glue on the top of the napkin when pressing it on. It helps to have a damp cloth near by to wipe sticky fingers. I used ribbon instead of a fabric strip and laced it up and down instead of around hole edges. Measure around your heart to know how much ribbon you will need. 36 inches was more than I needed for the napkin heart.


Subscribe to:
Comments (Atom)
